
Our downstairs bathroom has a lot of personality. It’s got dark grout between almond tile on the vanity, a black and white tile floor, black rubber baseboards and trim, and, for a little while longer, an oak slab door.
This weekend I was determined to impose a little serenity. Of course, that began by scraping out the old black grout, which left a layer of fine black dust over everything, including my hands. So much for serenity.

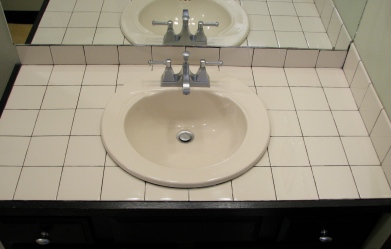
It’s a lot of high-contrast color and materials in a small space, all screaming for attention. It’s not subtle, restful, or peaceful. It makes me want to turn down the visual noise.
There are two ways to go when dealing with old grout. You can remove and replace, which is what I did. Or you can recolor your existing grout, using something called Grout Renew. I chose to replace mine, since it was never sealed properly and has been getting scrubbed out and washed away for years. Time will tell if this was the best way to go. It looks great now, but I’m wondering if the black grout will eventually show through.
I removed the grout with a flathead screwdriver, a utility knife, and a grout saw. It came out pretty easily. Because it wasn’t sealed, there were areas where there was hardly any grout left. But there were also a few areas I really had to scrub it out. I just kept wiping it away, and eventually got out my vacuum. I didn’t remove it completely. But several things I read said it just needed to be removed enough so there is room for the new grout to rest and adhere between the tiles. So that’s what I did. It didn’t occur to me until later that I didn’t notice if this advice pertained to replacing dark grout with a lighter color.

Because I was regrouting such a small area, I was able to buy a premade grout mix in biscuit. The instructions on the tub were pretty scant, but the internet is full of instructions on grouting. I bought a small grout float to apply the grout and a clean sponge to wipe it away. My materials are pictured below, and all together they were under ten dollars.

I added water up to the fill line on the tub and stirred until fully blended. One set of instructions I read online said the grout should be the consistency of mayonnaise. I stirred it up and let it sit for about five minutes. I stirred it with a paint stick, but the orange dye began to come off in the grout. So use a stirrer without dyes to avoid this.

I applied it mostly to the cracks between the tiles. I put a few dollops of grout in the joints of the tiles, and then took my grout float and worked it into the seams. You hold the float at about a forty-five degree angle spread the grout diagonally. I scraped off the extra grout and put it back in the tub. The whole process reminded me of frosting a cake.

The grout looks much darker when it’s wet. I was a little nervous I hadn’t made much of a change after all at this stage. Once the grout begins to feel hard—instructions say this can take from five to twenty minutes—wipe it away with a nearly dry sponge. I jumped the gun on this the first time and had to reapply in a few areas. I figured in my dry climate, it would harden right away. It took at least fifteen minutes for it to harden. The picture below shows where I’d wiped the grout away with the sponge, and where I had to reapply it with my finger.
After I got it to where I was happy with it, I left it alone to dry for forty-eight hours before I sealed it.
I used a spray-on grout sealer, but since I only needed to seal the cracks, I sprayed it into a paper plate and brushed it on with a small craft brush. I gave it about three coats, waiting about ten to fifteen minutes between coats.

After the sealer was dry, I used bathroom caulk in biscuit to fill in the corners and edge the sink. This was a harder, messier process than I expected. It was largely trial and error, and carefully cleaning caulk off the grout lines until it looked smooth.
But now that it’s done, it looks cleaner and more peaceful. I successfully turned down the visual noise, in one area of the bathroom anyway.


Pingback: Addressing problem areas in our small bathroom | House Over Head
Another amazing job from my amazing daughter!
Thanks, mom! 🙂
It looks fantastic! I’ve needed to re-grout part of our shower ever since we moved in 10 years ago. I keep hoping eventually I can just take a sledgehammer to the whole bathroom rather than re-grouting.
If you have to re-grout, it isn’t that hard. But it is more of a staging fix, since we’ll be moving out soon. If we were staying, I would love to replace the square tiles with granite or marble.